Instant JChem
Create, explore and share chemical data
Summary
Chemical data management from your desktop
Instant JChem (IJC) is an out-of-the-box tool that allows scientists to create, manage and analyze chemical structures and related non-chemical data. It serves as a desktop application that gives a convenient and straightforward approach to the analysis of chemical and biological data. Instant JChem is a database-centric environment that supports query and sorting functionality, and handles large volumes of data (hundreds of thousands of structures), both in local and remote databases- without any additional administration. Its wide ranging functionality includes customizable database views, integration of library enumeration, and dynamic population of columns with singular and combined molecular property and descriptor predictions.


Book a demo

Download
Benefits
Why you need Instant JChem

Relational database management tool
Locally supported databases, easily managable schemas, trackable properties and simple sharing

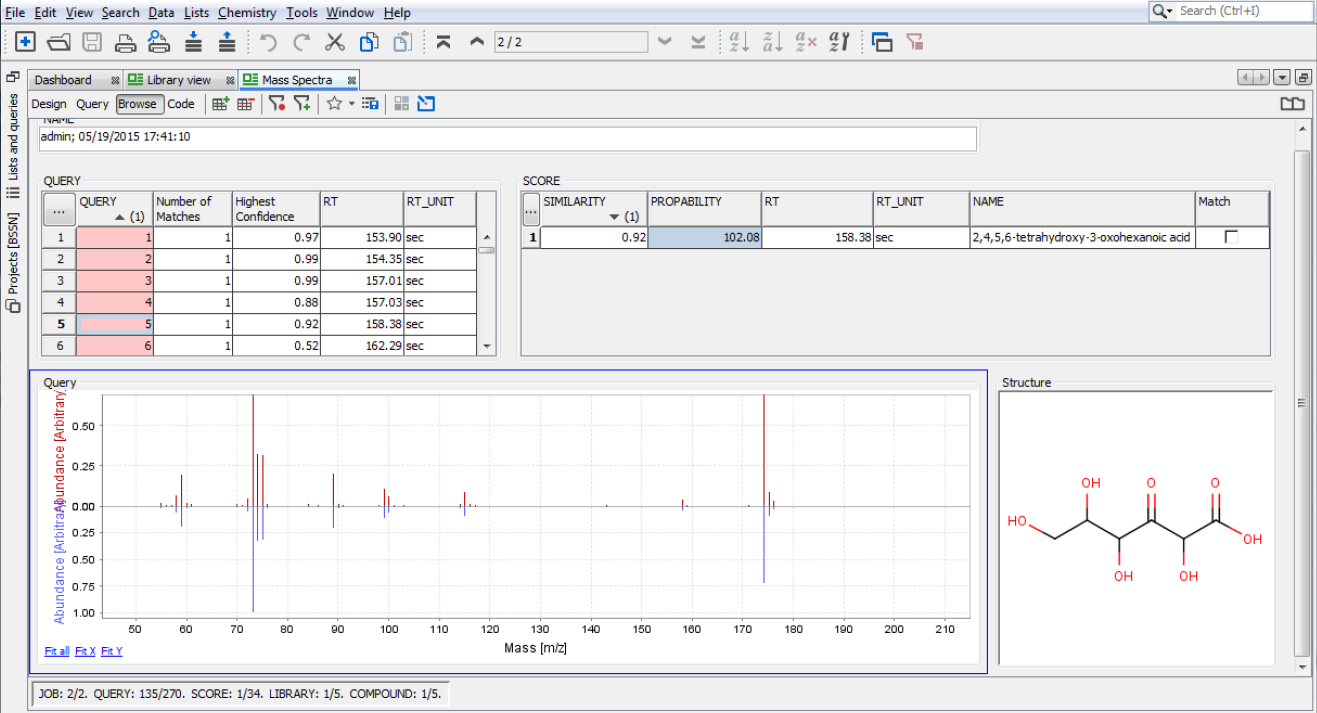
View and search the content of your database
Customizable forms and tables, complex queries, easy export and visualization

Visualization and data analysis
Higlighting data trends with a variety of charts, conditional formatting and data pivoting feature

Customizability
Public API enables the removal of limitations on box products and allows the support of specific use cases.

Web-based extension
Plexus connect enables access to relational databases managed by Instant JChem in an online environment

Features
Customizability to suit your needs
Public API enables the removal of limitations on box products and allows the support of specific use cases.
- Use additional Java modules or create your own
- Custom scripts in Groovy for specific functionality
- MiniReg as custom solution for lightweight compound solution and assay handling
- Consultancy services available
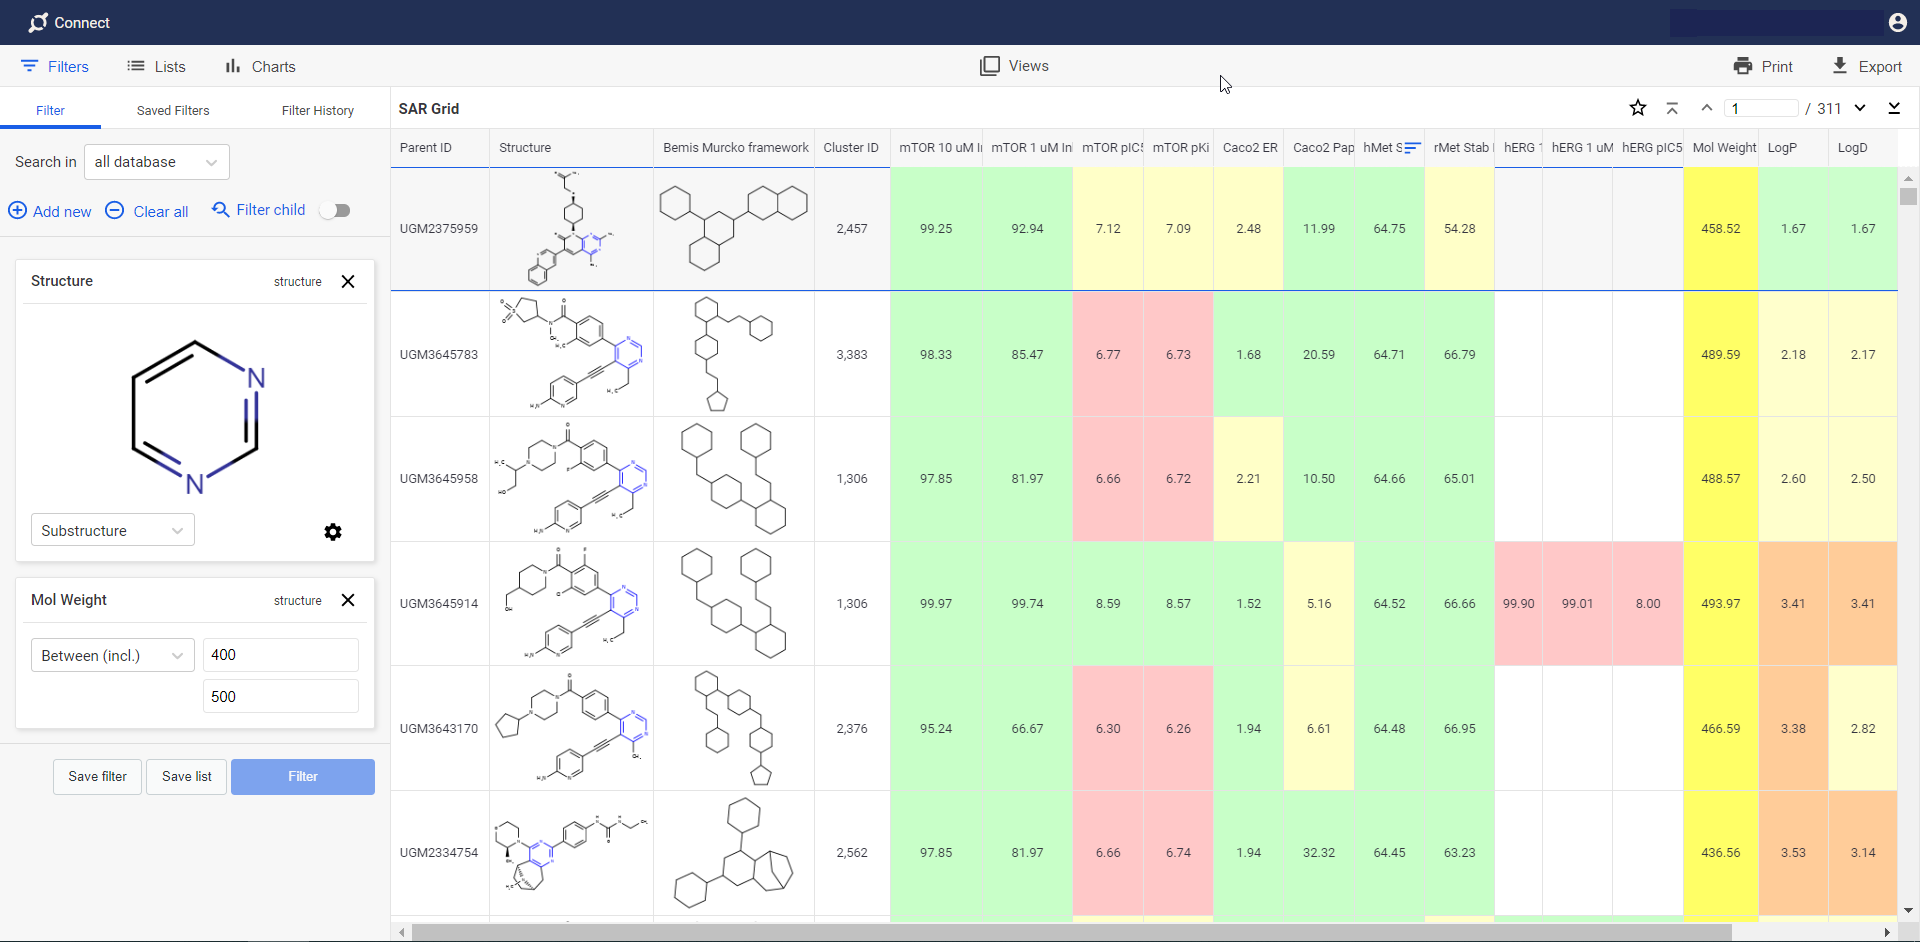
Plexus Connect
Web-based extension
- Plexus Connect is a powerful web-based extension of Instant JChem. It provides access to relational databases managed by Instant JChem in an online environment. Database setup, project management and user administration are through Instant JChem, making Plexus Connect an easy-to-operate tool for end users.
Documentation